I moved the airstream/travel to vtbirder.com so if you have not signed up for updates, you might check out the new blog posts. I plan to cover our upcoming SW trip there, so why not sign up to tag along?
I moved the airstream/travel to vtbirder.com so if you have not signed up for updates, you might check out the new blog posts. I plan to cover our upcoming SW trip there, so why not sign up to tag along?
 |
| The squiggles are reflections in the morning sun -- it looks ok with just the first pass of polishing. |
Between the weather, which has continued hot and humid with afternoon showers, and the persistent flecks and patches of clearcoat (which have to be removed with dabs of Strypeeze), the polishing is quite a project. As you can see, the top areas I have completed look pretty good. They will next get a pass with a finer polish which should remove most of the swirls and cloudy areas. Of course, I realized the other day that the two replaced panels in back did not have clearcoat, and seem to be a slightly different aluminum. They will polish up but not as shiny but who really cares?
 |
| You can see the contrast between the polished and unpolished areas here on the panel just above the buffer. |
One thing this project has stimulated is my planning for this winter's trip. I'm reviewing the dozens of campground where we have stayed and lidting the good ones, with sites we like, and also have a "never again list by states.
We've had a cold front come through so polishing should be a bit more bearable. It's fun to chalk off one more section, but there's always more ahead. Fortunately, we are in no big hurry.
 |
| Here's how the front looked at the start - lots of oxidation from the peeled clearcoat. |
 |
| Building arm strength controlling polisher. It looks cooler out than it was - 80 degrees with high humidity. |
 |
| The polished area looks very bright, with swirl marks from the coarse polish. So far, so good. |
I am using a new safer stripper that I bought from Vintage Trailer Supply. Here's part of whart they say about it:
For many years, vintage Airstream owners have relied on RemovAll 220 peroxid-activated paint stripper to remove the plasticoat from their trailers before polishing. RemovAll is no longer available in North America. Fortunately, PPG Aerospace makes a paint stripper based on the same principles as RemovAll. It is called Eldorado PR-5044.
PR-5044 is a peroxide-activated paint and primer remover. It works well because it is designed for removal of polyurethane and epoxy paint systems in the aerospace industry. PR-5044 is environmentally preferred and worker-friendly. It does contain petroleum distillates, so it does produce fumes. You will need to read all safety information before using. However, it is not a hazardous material and is much easier to use and safer than traditional aircraft strippers.
So, it looks like vanilla pudding and paints on rather easily. Here is the first panel I tried it on:
 |
| That worked out pretty well so the next day, I applied it on the upper section. |
After a thundershower rinsed it, I spent some time with water and rags removing the coating which tended to come off like Saran wrap. At times, whole sections several square feet in size just peeled off -- other areas were more stubborn. Some will require more stripper.
 |
| The removed coating looks like cellophane and will be easy to clean up later on. |
So, the upper right side is 95% done and after a break for the 4th, I'll start on the lower. It's slow going but I just realized, after talking with my brother, that the two new panels we had replaced are coating free. I figure I have about 14 hours in and another 20 to go - before beginning to polish.
 |
| The upper right side is about done - now to start on the decals and lower section. |
I have decided to tackle the peeling clearcoat on the Airstream on a casual basis - a panel or two at a time. So today I continued to use up the Stypeeze on some lower panels. I found that the top half came off fast - I could hear the covering crinkling up as I applied stripper below. The lower half was much tougher- I wonder if they put two layers down nearer the road.
 |
| The clearcoat comes off pretty well after 15-20 minutes using water and a rag (and protective gloves.) |
As I have cleared off areas, I am noting areas of so-called filiform. Filiform corrosion on Airstream happens at the cut edges, rivet holes, scratches, and fittings from moisture and ocean or winter road salt begins at the unprotected aluminum at those areas and spreads under the clear coat finish, where it flourishes because it cannot dry out easily. Various owners handle it differently - some ignore it, some try to recover it with clear lacquer, others wax the heck out of it.
 |
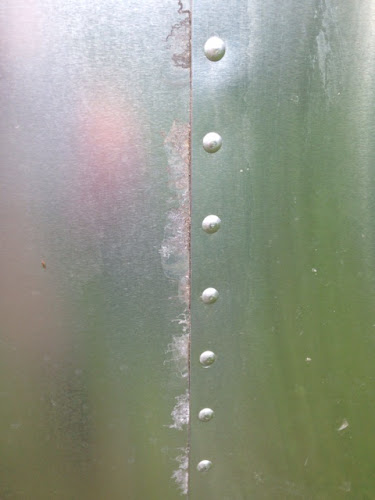
| Here is some filiform along a seam. |
 |
| filiform forms around rivets as well. |
In doing some online research, I found that a combination of wet sandpaper and then polishing is the way to go. I only had 400 grit sandpaper (I need 800, 1000 as well) so I tried a couple of test spots. Here's how it looks -- not sure it is better but it is nearly gone.
I purchased a gallon of stripper from Steve at Vintage Trailer Supply and will start using that next week. It promises to be easier on the user.
I read somewhere that it takes 200 hours to polish an Airstream the first time. I may do half this year and the rest next. So it might look a little strange - hey, get over it!
 |
| The clear coat and Airstream name was looking pretty ratty. |
 |
| The Strypeeze wrinkled up the clearcoat, which then could be wiped off. |
 |
| The non-oxidized areas look pretty good giving me hope for good polishing results. |
 |
| The rig hooked up and ready to roll down our newly surfaced driveway. |
 |
| There was a neat Canadian couple parked just ahead of us in the rest area and I quizzed them on their big Class C rig, which they've taken all over North America. |
 |
| There's no electricity out in Jen's woods and the solar panel never worked in previous trips. You can see why. |
 |
| The Airstream is now parked off the driveway in the only flat spot available, ready for the next adventure. |
For three years, we have tried to use a solar panel to charge our Airstream's battery with mixed results. There's too much shade and too many trees here in New England, especially in Vermont state parks where there are no hookups, period. So I bought a Honda 2000i and tested it out here at home and then took it with us to Ricker Pond SP last Sunday. It worked like a charm - it's easy to see why they are so popular.
We found it to be quiet while just charging the battery and a liitle noisier when making coffee. Toasting bread was louder but short-lived. I baked some Johnnycake in our small toaster oven and the noise was annoying - although not to others since we had no nearby neighbors. The bread was good, though. We'd only use the heavier demand tasks when all by ourselves, or when our neighbors' generator is loud.
At about 50 pounds, it's easy to load in the truck. We know that we can't run A/C without another linked unit but we rarely have used air conditioning in our travels. The initial reaction is very positive- probably should have done it before. It is nice not to have to worry about battery drain. Now if I can just keep ethanol from screwing it up. Happy Trails.
 |
| Patches of Bunchberry were all along the roadways. |
 |
| There are about a dozen private camps on the pond -- most of them quite old and modest. They do have electricity and satellite TV. Many can only be reached by boat or winding footpath. |
 |
| The large rock blocked off a road from vehicles. It was not cut -- it is naturally like this. |
 |
| A Pink Lady's Slipper tucked in along the trail. |
 |
| The state campground is tucked into the trees along the western edge of the pond. Here are a few lean-tos with one, with the red canopy, in use. |
 |
| Ricker Pond (95 acres) is located in the central portion of Groton State Forest along VT Route 232 just south of Lake Groton. |
 |
| Barry and Mica originally thought that this birdhouse was a gag gift but Momma wren has called it home for the last two years. photo by Barry K. Mansfield, Burlington, VT |
 |
| You can't see the intensity of the downpour but believe me, it was raining hard when I ran out in shorts and flip-flops to tug on these. Two of us pulled, slipped, fell, but moved the darn things. |
 |
| Just a about ready to go. Can you see the two or three items not ready for the road? (The roof vents are open, the step is down, and the radio antenna, which you can barely see, needs to be stowed.) |
 |
| The polished walls, with terrible reflections from outside, before I started re-installing beds and cabinets. |
 |
| Here is a similar shot after the bed, the cabinet, and the infamous curtain railing were installed. Getting there. |
 |
| My side is about ready to go with mattress in place. All it needs is the dog sleeping on it. |
 |
| What you can't see is the rusted bolts holding the jack to the tongue. |
 |
| The two bolts and on the right, the snapped-off bolt. At least the old jack of off the rig. |
 |
| I ground down the bolt prior to trying to drill it out. |
 |
| New jack ready to go. |
 |
| The snow has finally melted and it's time to tackle a myriad of projects to get the rig roadworthy again. |